Monday, November 23, 2009

Finishing up.

And now for the last step of this darned embroidery.
The last stitch is the 'spiderweb' stitch and what is so
great about it is that it actually involves very little stitching.
Here is where we were at the last time we were
doing this.. one weekend and 6 glasses of wine ago.
You can use whatever colors you want for this stitch.
The pattern calls out for your stem color, dark green,
and the middle knot color.. medium purple.
Start with your dark green color for the base of the web.

So, Bring your needle through the middle of the little star drawing;
you want to be at one of the inside ends of one of the little lines.
Working outward, stitch in each of the lines. Try to make them as
even as possible. The more even the lines are, the easier
things are for you later.

one stitch.

two.


Eventually, you have a whole wheel.. the bones of the web.
Knot off your first color and cut.
Sorry, mine looks a little wonky because I fixed one of my sides
that was too short. Try to disregard the wonkiness.

Now we switch to our Purple thread.
Start by bringing your needle up between two of the stitch lines,
as close to the top as you can get them.

see..

Then, you take your needle and run it under the stitch lines
to the right and the left of your thread, wrapping the right stitch line
with the new thread. If you ever did camp, think God's eye. yumm.

Continue this process by wrapping the needle around the stitch line
to the right of your new loose thread and putting your needle
under that stitch line and the next.

You have just wrapped
another line. Brilliant.
Keep up this process, running the needle under the stitch line
to the right and left of your floss...

Continually push the already wrapped floss up toward the middle
so it is nice and tight together.

In mere minutes, you will have gone all the way around the wheel.
What do you do now? Oh yes, keep wrapping.
And, wrapping.

Eventually, this mother will be the most beautiful God's eye you
have ever seen.

No, you are not done. See that little knot in the upper left corner?
It needs two friends. If you thought you were done knotting,
you were wrong.
Take your trio of purples and get going. Just like the first knots,
you need 4 threads and your bow tying finger.
You will make one knot in each color.

Ok, now you are done. Nice work!

Don't be afraid to hand wash your work when you are done to
get rid of pencil marks. Use a small dab of detergent.
I dry with a warm iron.

Holiday gift time! Make it happen!

Thursday, November 19, 2009

What's it all about

Sweetie sent me this today from Steven Burke,
who has been known to do a few T shirt designs
for Ambiguous.
This truly could be our life story.. I hope we
stop working soon!

So perfect!

Although, these days there is not even
time for dreaming!! Happy weekend!
Buy Ambiguous tees here.

In the home stretch..

Let's finish this mother up! Well, almost.
Get out your scrap for a few practice stitches.

just in case you can't identify the stitch we are getting started
with due to my overcrowded scrapadoodle,
it is the dark green one in the middle with my needle right next to it.
Yes, for the next two stitches we are going back to
the two colors from our beloved beanie.. in my case,
those are dark green and light green.

Let's start with the 'Stem' stitch.
Start by making a nice stitch of decent length.

The next stitch will start in the middle - on the right(or left) side
of what you are doing. It depends on which direction
you are stitching in, and I will explain later.
For this stitch practice, though, lets bring our needle up
on the right side of the stitch.

Which side?

The right side. Definitely.

Here's where shiz gets crazy.
from the right side, reach under the previous stitch and
yank it over to where your needle came up.
*Notice that now your stitch in on the LEFT side.
yep.

From there, make another decent sized stitch.
Notice how they are kind of hugging together. Aww.

The next stitch will come up right above the first stitch on the
right side..

So, keep up the switcheroo and you will end up with
a nice twisty donut looking stitch. Yum.
The Stem stitch is king of a fun, more stylized version
of a basic split stitch. We use it when we want to be
'Fancy'.
And, if you are like me, you want to be fancy often, almost always.

Our next stitch is the 'Leaf' stitch. I know, these names are
very original. Perhaps the most creative names ever.
For this guy, we have to draw a practice leaf on our scrap.
Make sure your leaf is nice and round. I ran into the problem
of making some ugly leaf tracings on my Poppy and, well,
my leaves are just not as fantastic as they could be.
Oh well.
So, you have your leaf. Brava to me and this fab drawing.
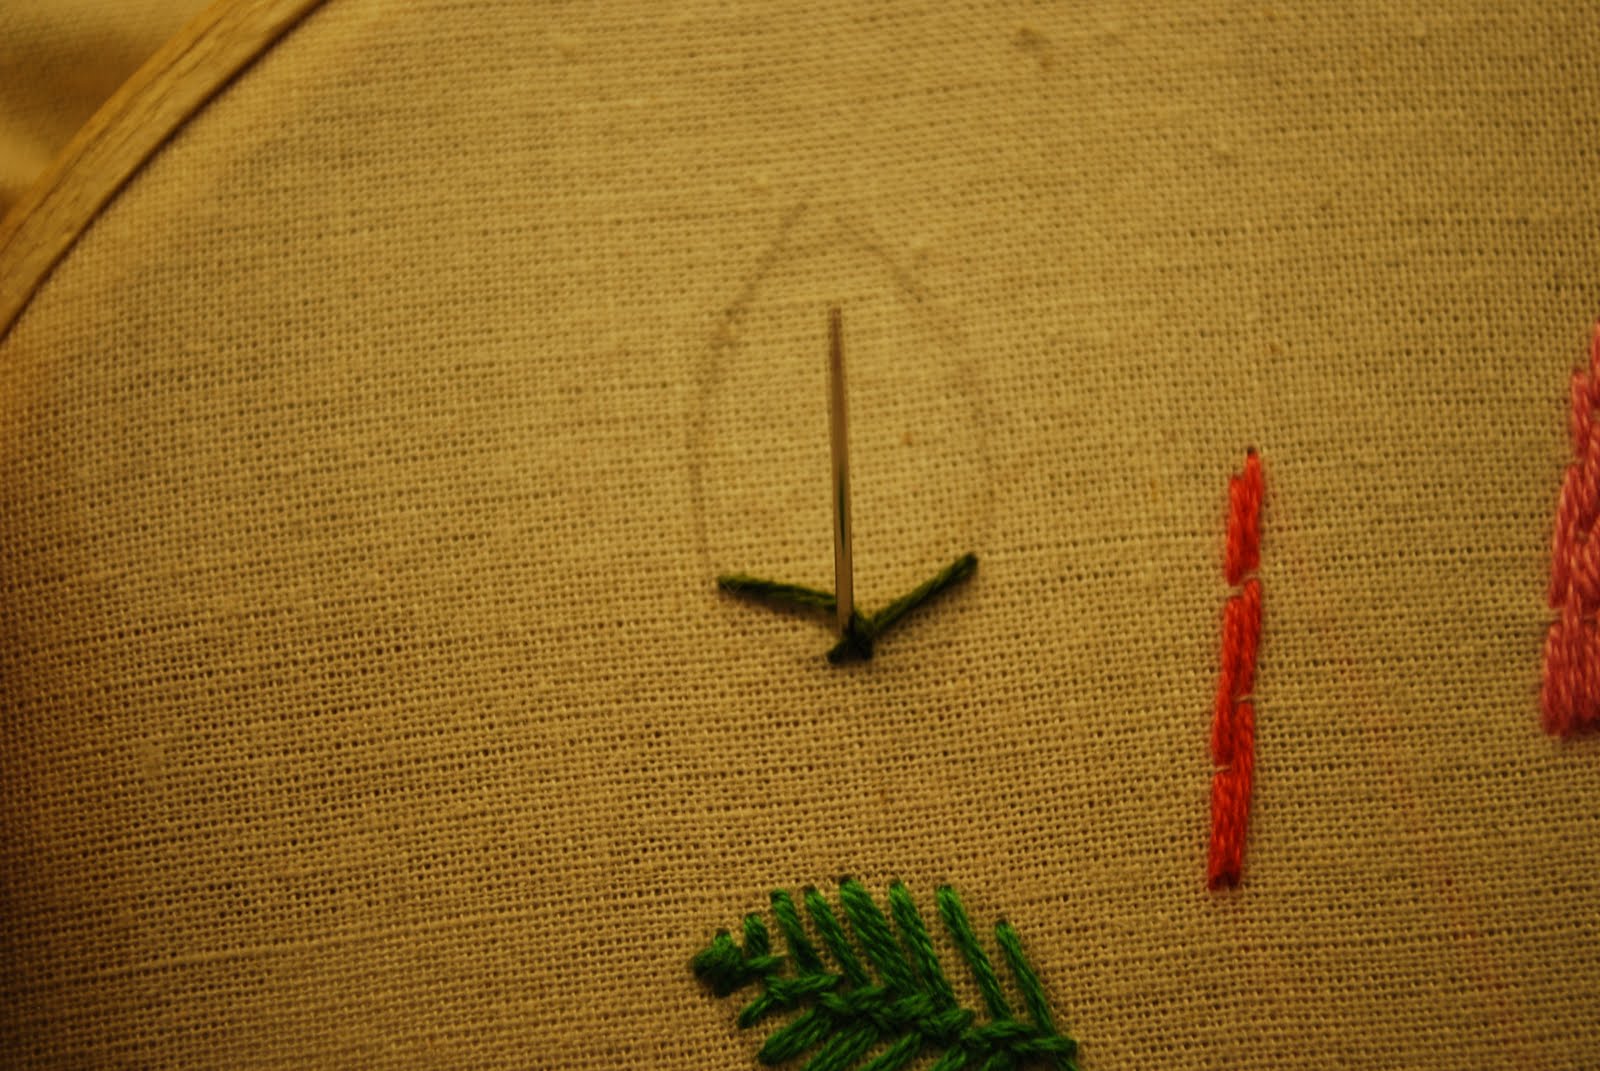
Ok. Start on one side of the bottom.. left or right, whatever
suits you best. So many choices.
For me, I chose left, so this explanation will follow that.

The next stitch will go up and to the right.. slightly angled.

The next stitch will start on the other side.. making a little
inverse V with the stitch( and a big V, really ).
This stitch will follow the first, in the opposite direction.

Next, we are going to get crazy again. Crazy embroiderers.
Your stitch will come up in the middle and do our
favorite bob and weave with the left side thread.
Note how the thread starts in the middle..

then gets crazy with the swoosh and grab of the left thread.
This stitch will be sewn in above your first stitch on the
right side, with
a small space between the two.

Next, your needle will come up on the right side between the
two threads. Keep the needle very close to the middle. We want
the little backbone of our leaf skeleton here to be nice and tightly
braided.

The next stitch will go to the left. Notice how that stitch seems a
bit saggy and definitely not the strong straight stitch we need
for our leaf skeleton perfection. Don't despair. This is where the
'Bend and Snap' comes in. Ok, that doesn't really apply.
But, I love saying it.
This is where our little duck under stitch grab comes in again.


repeat.

Look at this gorgeous leaf.

Notice the tiny braid back bone.

Time to apply what we've learned.
The 'Stem' stitch is for well, the stem.
And, the leaf stitch? Uh huh.

The only snag that I can come up with here is
when you stitch the stem stitch on a curve, make sure
your needle is popping out at the top of the stitch and you
are digging under the stitch and pulling it upwards.
Gravity is already against you, so you want to
pull the stitch upwards.

Finished stem and leaves.
You can play with the colors any way you want.
I put a little doodle at the end of my middle stem and
I don't know why. I guess I was in the moment.
Notice the far right leaf.. there are some pencil
marks lefts over as I tried to correct that
beastly leaf drawing.
Luckily, Pencil marks will wash out.
We can discuss this later.

Let's bring it home tomorrow with the final stitch
and stop this insanity.. for now.
Related Posts with Thumbnails